What is the process of stripping and waxing floors why is it important and how can it be done effectively
Stripping and waxing floors is an essential maintenance process used to restore the appearance, cleanliness, and durability of hard flooring surfaces, particularly in high-traffic areas.
Stripping and waxing floors is an essential maintenance process used to restore the appearance, cleanliness, and durability of hard flooring surfaces, particularly in high-traffic areas. Stripping involves removing old layers of wax or floor finish, while waxing applies a fresh protective coat. This two-step process is especially important for floors that are prone to wear and tear, such as vinyl, tile, and wood. The outcome is a floor that looks cleaner, shinier, and more resilient, offering protection against dirt, stains, and further damage.
Why is Stripping and Waxing Important?
Floor stripping and waxing serve multiple purposes, making it a critical aspect of floor care. Over time, floors that are regularly cleaned and maintained with wax can develop layers of dirt, dust, scuff marks, or wear, resulting in a dull and unsightly surface. Stripping the wax removes these old layers and prepares the floor for a fresh coat, which not only enhances the appearance but also prolongs the lifespan of the flooring.
Waxing provides a protective layer that helps to seal the floor against damage from moisture, dirt, and spills. In commercial spaces, such as retail stores, hospitals, and office buildings, maintaining a clean and attractive floor is essential for creating a welcoming environment. In residential settings, stripping and waxing preserve the quality of the flooring and keep it looking pristine. Additionally, the wax helps to make floors more slip-resistant, improving safety in high-traffic areas.
Steps for Stripping and Waxing Floors
-
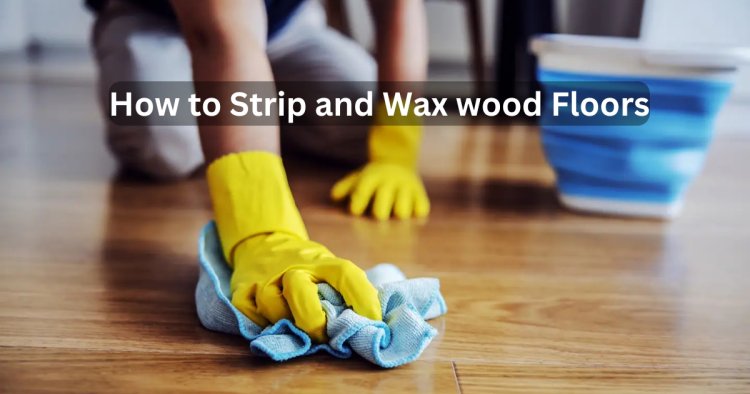
Prepare the Area: Before starting, clear the floor of any furniture, rugs, or obstacles. It’s essential to work in an uncluttered space to make the process more efficient. Ensure the area is well-ventilated by opening windows or using fans, as some stripping products can release strong odors. You should also wear protective gear, such as gloves, goggles, and a mask, to shield yourself from chemicals used in the stripping solution.
-
Choose the Right Stripper: The first step in the process is selecting a suitable floor stripper. There are various types available, so make sure you choose one that is appropriate for the floor material (vinyl, tile, wood, etc.). Read the product instructions carefully and, if necessary, dilute the stripper as recommended. It’s always advisable to do a small patch test in a discreet area to ensure the stripper won’t damage the floor.
-
Apply the Stripping Solution: Pour the stripping solution onto a small section of the floor. Using a mop or a sprayer, apply the stripper evenly across the surface. Work in sections so you don’t let the solution dry before you scrub. Allow the stripper to sit on the floor for 10 to 15 minutes (or as instructed) to break down the wax layers. During this time, the wax will start to loosen and soften.
-
Scrub the Floor: After the stripper has had time to work, scrub the floor with a stiff-bristled brush or a power scrubber. The scrubbing will agitate the wax, lifting it from the floor. Focus on high-traffic areas that may have more built-up wax or dirt. For large areas, a floor scrubber machine can make the job faster and more efficient.
-
Remove the Residue: Once you’ve scrubbed the floor, use a clean mop or cloth to remove the wax and stripper residue. Frequently rinse the mop in clean water to avoid reapplying the old wax. Once most of the wax is gone, it’s essential to rinse the floor thoroughly with clean water to remove any remaining stripper and residue.
-
Dry the Floor: Allow the floor to dry completely before moving on to the waxing stage. This is crucial because applying wax to a damp surface can prevent it from adhering properly and lead to an uneven finish.
-
Apply the Wax: After the floor is dry, it’s time to apply a fresh layer of wax. Use a clean mop to spread an even layer of wax over the floor, working in small sections at a time. Be sure to apply thin coats rather than thick layers, as thick layers can become sticky and create uneven patches. Let the first coat dry for about 20-30 minutes, or as recommended by the product instructions.
-
Buff the Floor (Optional): After the wax has dried, you can buff the floor using a floor buffer or polisher to achieve a high-gloss shine. Buffing will smooth out the wax and create a more professional, shiny finish. If you’re aiming for a more matte or satin finish, you can skip this step.
-
Apply Additional Coats (Optional): For extra durability and shine, you may choose to apply additional coats of wax. Most floors require two to three coats for optimal protection and a polished look. Allow each coat to dry thoroughly before applying the next one.
Conclusion
Stripping and waxing floors is an essential process to maintain the beauty and longevity of hard flooring. By removing old layers of wax and applying fresh coats, you restore the floor’s appearance, enhance its protective barrier, and prolong its lifespan. While the process may take some time and effort, the results are well worth it, especially in areas that experience high foot traffic. With the right tools, products, and techniques, anyone can achieve a beautiful, durable floor that will continue to shine for years.
What's Your Reaction?